Sunday, November 24, 2024

GriGri Lead Rope Solo Mods and Experiments


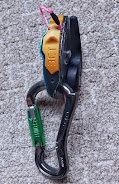
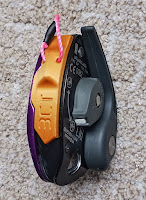
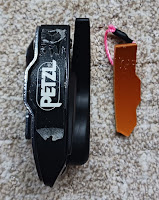
GG LRS Mods - Introduction*

Note: if you landed here and are interested in other blog topics I’ve posted about related to climbing, TRS or LRS, or other devices, please scroll down through the chronological listing of my posts. For the time being, I'm keeping this at the top

This is a dynamic index to my Grigri modifications for LRS (Lead Rope Solo). The index will be added to and updated as I have time - it’s a tug of war between experimenting, researching half-baked ideas, documenting past/present in-progress/and completed projects with actual climbing! 😕 I should note that many mods may not have lots of proven use and data behind them, and thus should be approached with caution and care. I hope to publish cautions and failures also, so that others can learn from and build upon should they desire. 

The index and links to posts are for archival and documenting purposes only (or possible entertainment - ‘shits & giggles’). If you utilize this information, you do so at your own risk and YOU take full responsibility.

(Background: I had wanted to start a separate, invitation-only, climbing list on Discord called: Freaks and Geeks: Cutting Edge Rope Solo Ideas and Experiments. However, I didn’t want the responsibility of setting membership criteria (it’s not for all rope soloists) and moderating the group itself. So this index documents my personal ideas, experiments and practices so far. Most of the mods are for the GG+ and GG 2019. However, a few will apply to the Neox and GG 2 which will be noted.)

Disclaimer: Rope soloing is dangerous. You should not rope solo unless you are experienced in lead climbing, top rope soloing, and self-rescue techniques. Using a stock or modified Grigri for rope soloing is beyond the manufacturers approved use of the device and voids the warranty. It may ruin your device, and could easily lead to injury and death. GG mods for rope soloing is an advanced level topic and is only the last method that should be used to advance climbing performance. Experience; systems knowledge; backup methods; physical training; and developed wisdom…all by FAR take priority over modding a GG for hoped for improved performance. Anything that actually involves modifying the Grigri by cutting, grinding, gluing, etc. should only be done by a skilled, experienced and confident tinkerer!

* Even though this outline might appear fairly comprehensive, it does not pretend to be. It’s only a list of things I’ve tried, am in the process of trying, or an idea yet to be tried. If an item relies heavily on other’s work, I’ll try and provide a link if one exists, pending originators’s approval.

~~~~~~~~~~~~~~~~~~~~~~~~~~~~~~~~~~~~~~~~~~~~~~~~~~~~~~~~~~~~~~~~~~~~~~~~~~~~~~~~~

Index

KEY:
Outline/indents = typical logical relationships
Idea = half-baked thought
Proposed = some specifics re the proposed method 
In-progress - actively experimenting
Done - finished but unknown when I’ll write it up
Failed - initial experiments yielded no useable outcomes
Coming - on my short list to be written up

Introduction and logical ordering of mods


Grigri HUR methods (held upright) - an Introduction - coming

    1.  Drilling holes
            A)  Plastic spine - done
            B)  Pivoting Cover - done
            C)  Metal plate, handle side - done
    2.  Non-drilling
           A)  Loop through pivoting side plate - done
           B)  Loop around cover axle - done 
           C)  BCT GG modifier
           D)  Steel tab - done
           E)  Plastic tab - done
           F)  Epoxy putty - proposed
     3.  HUB Bridle
           A)  Fixed Bridle
           B)  Bridle Slider (BSer) - in progress

Chest harness release connections - for increasing the likelihood it will catch an inverted fall

    1.  Introduction and theory
    2.  Mechanical - force actuated
           A)  Velcro - done
           B)  Fishline - done
           C)  Derek Averill’s Fuse Widget 
           D)  Elastic - proposed
           E)  Adjustable Magnetic - in progress
    3.  Gravity switch
           A)  Mechanical: Ball & slider - failed
           B)  Electronic - electronic release (accelerometer) - proposed

Grigri rope tab modifications: intro and warning

The removal of the rope tab on GG2019 and GG+
    1.  Complete Removal
           A)  Mitigating cam arm rope cut dangers
                1)  New cam arm rope tab (scroll down to mods #4 & #5 in linked post)
                2)  Rope guide finger on pivoting side plate (GG+ only) 
                3). Epoxy putty fillet GG+ only
    3.  Neox - coming
    4.  Grinding & trimming pivot cover (only helpful for GGs with modified or removed rope tab) - coming
    5.  Grigri spine/separator shim (only helpful for GGs with modified or removed rope tab) - coming

Cam Arm Spring Mods (for controlling lockup)

    1.  Neox - Spring Removal 
    2.  Spring tension release 
          A)  GG 2019 - Grinding end of spring off 
          B)  Pushing Spring End inside of body (GG 2/GG 2019) - coming
    3.  Adjustable Magnetic Cam Arm Release (GG2019/Neox-spring disabled or removed) - in progress

Neox for LRS and TRS

Other ideas/methods for modifying/controlling lockup


GG Lever Shortening


Wednesday, October 23, 2024

BCT Grigri Modifier Review


https://blissclimbingtech.com/gg-modifier/

Note: Full disclaimer - Yann  (Bliss Climbing Tech) provided me with a with a GG modifier for my evaluation free of charge. 

Disclaimer 2: This blog post is not a how-to or primer in LRS (Lead Rope Soloing). It is written for those who are experienced and competent. If you're inexperienced, seek out a mentor and/or appropriate source of info.


Disclaimer 3: all GG’s are not approved or designed for rope soloing. So do so at your own risk.


Disclaimer 4: Using the HUR position doesn’t protect against head first falls. You should ALWAYS have a reliable backup and you should ALWAYS wear a helmet. Also realize that depending upon the type of back-up system used, you will potentially fall the length of your cache loop+ if the GG doesn’t catch.


There are many ways to rig a GG for HUR position. Most involve some type of modification of the Grigri and involve drilling. While I don’t consider these mods to be dangerous, it can be tricky to do it well without messing up your GG. There are also several ways that don’t require modification. However, I consider those temporary and mainly for testing.


Both Kobe Burdack (FB LRS list) and I came up independently with non-destructive ways to mod the GG that doesn’t involve drilling, by gluing an external attachment point for the cord. Kobe's is 3D printed.


Mine is a custom shaped from a 1/2” square acrylic rod. The reason for the multiple holes was to experiment with different hang/attachment points and the effect they might have on my specific GG-rope combos. Both Kobe's and mine are permanently attached to the spine of the GG with glue.


Bliss Climbing Technologies (Yann Camus) has further refined these ideas and offers a slick way to attach a GG to a chest harness for rope soloing without having to make any permanent changes to the GG. 


Here's a quick summary of the GG Modifier's characteristics:


Pros: 

  • Low profile
  • Breakable cord attachment
  • Angle of attachment is optimized
  • Relatively easy to attach (follow the instructions!)
  • Nice chamfered edges on the hole for cord
  • Can be removed because of the type of glue used (Aqualseal+ FD)
  • Keeps cord loop out of the way

Cons

  • Price - expensive!

Additional thoughts:

  • Color of GG Modifier: yuck
  • Colors of cord: double yuck
  • HOWEVER...this is a personal opinion and in no way affects it's performance. AND, Yann says he now offers different colors.

The GG Modifier is great for those who don’t want to drill and potentially mess up your GG. It eliminates the question of where and how to drill, is stronger than drilling the plastic spine, and eliminates the frustration of threading a cord through the interior of the GG. It’s a great addition to the LRSers who don’t want to permanently mod their GG. I can highly recommend it for a stock GG+ used in TR mode. However personally, I wouldn’t use it with a rope larger than 9.4 because of the feed friction. YMMV.


Because of the type glue that is used to attach it, I was able to attach and remove it from a number of GGs for testing. (see Yann's video for how to remove). While Yann has stated that it can be used on any GG or Neo, I’ll add my experience and opinion.


GG original (didn’t try - got rid of mine a couple years ago, so can’t verify)

GG2 - same as above - (general consensus is though, don’t use it for LRS HUR)

GG 2019 - works but I don’t recommend because of the strong spring and the potential for delayed catch and high clip failure (YMMV - some still prefer to use it in HUR position)

GG 2019* - modded to the nth degree (inactivated spring, shaved tab and other bits). Works well for me, but super grabby and will short rope you if you don’t know what you’re doing or panic clip.

GG+ stock - it works and is the easiest and safest way to non-destructively modify for LRS. 

GG++ modified to the nth degree. Works very well for me, but I don’t recommend - tricky to mod and get used to

Neox* - it works, but I'm still in the modifying and testing stage. The verdict is still out. (I’ve removed the cam arm spring and ground down the rope tab so far. More to come.) 


The negative comments above aren’t because of the GG modifier itself. It is my opinion based on the nature of these particular GGs used in the HUR position.


Bottom line. The GG Modifier is a great product for those who don’t want to permanently mod their GG and can highly recommend it for stock GG+ in TR mode if you're willing to pay the premium price.


End note: Unknown at this point in time is how long the Aquaseal+ FD glue will last, or if it will hold permanently. 

However, if the glue should fail, it should not be dangerous because the GG Modifier is only holding GG upright for feed - it's not relied on for fall protection.

As a final test, I trimmed it down somewhat and epoxied (JB Weld) it to the spine to make it permanent on one of my  GG+. This also allowed me to tweak it's placement slightly (and I like curves, not angles! :-). The stock GG modifier needs the length to provide more contact area for the Aquaseal+ FD glue.


Sunday, April 21, 2024

To Extend or Not to Extend?

 TO EXTEND OR NOT EXTEND

Or, how to make a mountain out of a molehill

The following is written up while I'm bored and (mostly) not climbing as per my (a non-climbing) docs advice while waiting for double hernia surgery. It's meant partly in jest, but has some practical advice also.


When TRSing, many people feel they need to extend the top device to make sure that, in the event the top device fails to lock up, the secondary device will not slam into it preventing it from locking up. I personally seldom extend the top device and have never experienced them colliding and rendering the back device ineffective. I know, it only takes once… However, in reality it may be more of a common TRS myth than reality (and lord knows there's plenty of those), though I'm open to being proven wrong. 

If you are of the persuasion that you need to extend the top device, there is a simple way to do this using a 25cm 12mm Sterling dyneema sling (or equivalent - the more common 30 cm slings are a bit too long for my tastes) looped around the belay loop and connected to the 'biner of the primary device. It extends the primary device up ~4" which is more than adequate to keep most devices separated in the event the primary fails.

                        normal climbing mode                                                 top device failure mode

A common practice to extend the primary device up, is to use a Quickdraw. To me using a QD has several potential drawbacks. while the sling extension has some advantages:

1)  The sling is lighter and simpler.

2)  A QD can extend it far enough up that it can become an issue in relation to the face. While at rest, it may seem that it is not anywhere near your face. However when you "fall"/weight the rope, the harness is pulled up on your waist, while the upper body compresses down due to gravity. This is body specific. This drastically reduces the clearance between face and device especially if your head pivots down. If you have a long torso, you may not ever experience this. Whereas those with a normal or short torsos could more likely experience the potential for adverse interaction.

3)  It's not just the face that can be an issue. Hair can also become an issue. This happened to my son years ago and it not only caused an issue for the device locking up but also was difficult trying to extract hair from the device. He ended up having to pull out clumps of hair from his scalp in order to free himself  (no knife - ouch!) Word of warning - if you have long hair make sure to keep it out of the way (and carry a small knife)! A practical (but not life threatening) concern for keeping the devices separated: if the back up toothed device does make contact with the primary device, it may be difficult to release the toothed device so that you can continue climbing or transition to descending.

4)  Finally, when using a quickdraw to extend the upper device, you also greatly increase the # of connections and complexity of the system. In designing systems, simpler is almost always better and safer. The number of connections using the different methods:

  • Direct to belay loop - 2: 'biner to belay loop; 'biner on TRS device
  • Looped sling - 3: belay loop to looped sling; looped sling to 'biner; 'biner on TRS device
  • Quick draw - 4: belay loop to QD 'biner; QD 'biner to dog bone; dogbone to top 'biner;  top 'biner to TRS device.

Finally, the above info is in relation to using both devices on a single rope. If you are of the persuasion you need to use two devices with each device on a separate rope strand, then use a normal 30 cm/12" sling works well - double looped through the connecting leg loop strap and harness belay loop keeper - exactly like the belay loop This gives about the same ~4” of separation as the method above but also helps separate the two strands of rope. 

There you have it. How to 'make a mountain out of a molehill'.

PS Device separation can also be slightly modified by your ‘biner selection (smaller for backup, larger/longer for primary device).


Monday, April 15, 2024

Thoughts on Using the Wild Country Revo for Both Top Rope Solo and Lead Rope Solo


This is a re-creation of a series of posts I did on the FB Rope Solo list years ago when the Revo first came out. When I changed my FB  identity because of getting hacked, all my posts were lost. This is basically a recreation and archive of the content of those posts. NOTE: I no longer use the Revo, but for those who are dedicated to it, this blog post may prove useful. Climb safe!

~~~~~~~~~~~~


The Revo is a relatively well known self-belay device in rope solo circles that is used as a poor man’s Silent Partner - that is, a bi-directional feed device that operates on the basis of centrifugal force/speed lock to stop rope feed. The main advantages are the ease of feed and the ability to catch head first falls. However, it is seldom used/mentioned as a TR solo device. It’s possible to use if for both LRS and TRS if you’re aware of its limitations and are willing to use it within those constraints. I will not detail the use of it as a LRS device as there is plenty info/resources on that if one searches. This will detail my experiments and limited use of it for TRSing.


First, a bit of background info on the Revo. Functionally it is two separate devices in one. For normal belaying, it is similar to an ATC, where one hand always stays on the brake strand holding it in the event of a fall. The climber’s fall is stopped by the friction of the rope being forced down into both the “V” slots ears. Functionally this is no different than an ATC.


Secondly, the Revo also has a backup system in case the primary system fails. I.e. if the belayer were to lose their grip on the rope and it started zipping through the device. In this scenario, the internal wheel starts spinning and at a certain speed (~4 m/sec), the centrifugal force cause cogs to pivot outward that catch in notches in the body and stop the rotation of the wheel. The wheel is like a narrow “V” groove pulley with internal ridges which provide friction on the rope, stopping it from sliding through the device. This operates independently of the external ears/jaws. 


It is this second function that is of interest for LRS/TRS. The first ATC-like function of the external ears/jaws actually can cause additional friction that impedes the rotational speed of the wheel and thus slightly delays the lock-up. When the Revo is used for TRS these ears/jaws also cause extra friction on the rope which makes the feed less than desirable. (There are other undesirable features but they’ll be covered below at the end of the post).


This friction of the jaws on the rope can be mitigated to a degree by having the rope pass through a fat aluminum belay ring as it exits the Revo (see lead photo). This acts as a smooth bearing surface that protects the rope from getting sucked into the jaws and causing friction of the TRS rope feed. This can be easily tested by getting a rappel ring (the fat, totally round cross-section ones work best: https://hownot2.com/products/aluminum-rappel-ring) and stuffing a bight of the rope through it before inserting it into the Revo. 


For TR testing, I used an old 10.1/10.2 rope with some weight on the free rope end. I never tested or used it with a second back-up device - but I always used an occasional back-up knot to keep me off the deck if it failed. I used it for a month or two and found that it fed well enough that I was happy to use it as my my main TRS device - especially for doing laps. If this interests you, test it for yourself and see what you think. It may or may not make a significant difference with skinnier ropes (<9.4) I only tested it with the larger rope.


Drawbacks


There are several drawbacks to using the Revo as a TRS device. Ultimately this is why I moved on to other devices (see my other blog posts other devices I've used). If interested, you should assess its strengths and weaknesses in relation to your routes, goals, style, and risk assessment.


  1. Rappelling: Because the rap ring functions to decrease the friction of the ears/jaws on the rope, this means that it takes an inordinate amount of pressure holding the free strand of rope to keep a controlled descent. There are many ways this can be mitigated such as using a Freino ‘biner; putting a bight of rope around the load strand; putting on an ATC below the Revo; or using a ‘biner and quick link in line to create a makeshift 'biner brake to create additional friction; etc. I'm sure there are other ways also.
  2. There is no immediate lock-up like many TRS devices when weighting or falling on the device because the of the speed actuated lock-up. It takes 3’-4’ to to gain enough speed to lock up (unless you have modded the internal spring inside the Revo.) This can be disconcerting if that’s what you are used to; if you’re climbing pushing or limits; or, if you are climbing on terrain with objective hazards where you want an immediate lock-up. If you’re on overhung terrain and or mainly climbing below your red-point limit, it is less disconcerting once you practice and get use to the delayed lock-up. 
  3. Finally, once locked up and hanging on the Revo, there is the possibility of it unlocking due to the weight of the free rope. This could result in a repetitive lock/unlock situation that while disconcerting, is probably not dangerous in most situations. Only experimentation with it will tell if this will be an issue for you. It is dependent upon the weight of the free rope, which is an interplay of the the height of the climb, size/weight of the rope, and the friction on the rope caused by the terrain (i.e. if less than vertical).

TRS Conclusion:


If you’re interested in just using the Revo for TRS and have tested the rap ring and considered all the factors above, you can stop reading here. If you’re interested in using it for BOTH, TRS and LRS, read on. There is a modification to the ring that will make it easier to use for both. The modified ring is NOT necessary if you are only going to use it for TRS.


Modifying the rappel ring for LRS


If you also use the Revo for LRS and would like to use the rap ring for TRS, there is a mod that can be performed that will turn the Revo into an “all-in-one-device” by leaving the rappel ring permanently attached to the Revo. Leaving it permanently attached does not interfere with LRS (or TRS).


Steps for modifying the rap ring

  1. Drill a series of holes to make a groove in a 2x4 to hold the ring securely vertically while drilling it. 

  2. Clamp block to drill press to hold it steady.
  3. Drill hole, slightly larger diameter than the cord, that goes through the side of the rappel ring. Getting the hole started is the biggest challenge and might require you to start the hole perpendicular to the ring then turn it 90 deg..

  4. Once hole is drilled, use a larger drill bit or a conical grinding burr on a Dremel tool to slightly chamfer the sharps edges of the cord hole.
  5. Feed a 6”-8” piece of 2mm accessory cord through the drilled hole in the rappel ring
  6. Tie each end of the cord to each side of the jaw using an overhand knot.
  7. Cut ends close and burn/melt the ends. 

                         
If done as shown in the photos, the cord will be completely out of the way and can’t interfere with the internal Revo wheel and centrifugal lock but allows the ring to hang close to the Revo body when using it in LRS mode and both strands hang down. If you don’t use a cord to hold the rappel ring in place while LRSing, it will slide down the rope and be non-functional and cause other havoc. With it attached, you never have to take the rope out of the Revo when transitioning from LRS/rapping/TRS. You can virtually use the same setup without any changes - something that can’t even be said for the Taz Lov.


Addendum


If you don’t like the idea of attaching the rappel ring “permanently” to the Revo, you can also put a larger loop of cord through it and tie it off in a loop that hangs the ring from the ‘biner. You’ll need to play with the length of the cord to get it just right. I personally did not care for this method as well as the method detailed above.


When using a Revo there are other potential negative considerations such as re the durability of the Revo; potential for shredding the rope sheath during a high factor fall, etc.  These issues are beyond the scope of the this blog and for you to research and assess.


What I would do differently:


Instead of the Revo hanging down from the belay loop, I would attach a chest harness/lanyard to the Revo ‘biner and hold it up. This will keep it from sliding up and down the belay loop and slightly shorten the distance of a fall. It will also hold the Revo higher up so that it will be easier to grab the rope for clipping. In some of the photos you can see some of my experiments for attaching the Revo with a cord directly to the harness and in others the holding the 'biner up on the belay loop with accessory cord.