
When I started up SICgrips one of my main observations was that most hangboards and training grips devoted an inordinate amount of space for edges/pockets/crimps. Whether a pocket, a 1-2 joint edge, or crimp, they are all basically the same grip/hand position. This is fine if you mainly do face climbs with edges, but it leaves out many other grip positions that most climbers encounter. If one were to just use one edge that could serve multiple uses, then the grips could include other hand positions and would provide a more balanced and functional training tool. In addition if you are able to adjust them around all three axis (vertical, horizontal and rotational), you would have a super versatile set of training grips that are easy on the joints. This is one of the main design principles behind our Gstring PROs and Pocket Rock training grips.
6GRIPS offer the following grip positions:
- half-hand sloper (4.5" diameter)
- wide pinch
- medium pinch
- large rounded jug
- flat or sloping edge (half-hand, 2nd joint, or first joint)/variable depth crimp
- variable difficulty round/sloper crimp

While they are not as sexy as our Gstring PROs or Pocket Rocks, these grips are simple, versatile, cheap to make, compact, and lightweight (18 oz.), If all the materials are gathered ahead of time, they could be made in an afternoon and, depending upon materials that you may already have, they can be made for as little as $10. However, if you have to go out and buy everything, they'll cost considerably more, though you'll end up with materials to make at least two or more sets because of the minimum quantity most hardware stores sell.
We have strayed somewhat from one of our guiding principles in our last two DYI projects: Continuum Board and gBar. However this current project is a return to our roots and offers the DIYer a very simple and versatile set of grips with minimal cost, time and number of tools.
Materials:
- 1/2" x 6" x 4.5" piece of poplar plank for hardwood plywood
- 6" piece of 4" dia. PVC (2' is usually the minimum quantity you can buy)
- 3/4" half-round x 6" x 2 pieces hardwood (oak or poplar - hardware stores frequently sell this as trim and is sold in 8 foot lengths)
- 5mm x 10' accessory cord
- 2 sheets of 320 grit sheet sandpaper or a roll of 4.5" wide PDA (pressure sensitive adhesive) sandpaper
- contact cement if not using PSA sandpaper
- 24 - #4 1" wood screws
- epoxy
Tools:
- drill
- hand saw (I used a Japanese pull saw but a table saw is even better if you have access to one)
- screw driver
Assembly Notes:
The grips shown are 6" wide - you can modify the width to suite the size of your hands.
4.5" wide PSA (pressure sensitive adhesive 320 sandpaper is what I used. You could also use sheet sandpaper and contact cement. With sheet sandpaper, it could go the whole width of the grip, however the cord will rub on it and wear faster. Update: I've actually ended up removing the sandpaper. I like it better without. I've roughed up the wood and PVC with 80 grit sandpaper, then used a rosin bag along with chalk to increase friction. Very easy on skin!
4 wood screws were used to hold the PVC to the 1/2" wood. I used epoxy with rubber bands to hold in place and once it was set a bit (5 minutes) I drilled the holes and put the screws in. Make sure to counter sink the hole so that the screw heads will fit flush.
If cutting the 1/2" wood on a table saw, use a 5 deg. blade tilt to help match it to the inside diameter of the PVC pipe. Otherwise if you use a hand saw, slightly sand the edges to match the curve on the inside diameter of the PVC.
Three wood screws were used to hold the 1/2 round to the grip and they were put in at an angle. This was done so they didn't come through the 1/2" wood and to make sure the screw head were away from the primary surface where the fingers would be contacting it.
Round, the edge of the PVC on the side away from the crimp to a radius that feels comfortable to your fingers. For me this was somewhere around a 1/4"r to 5/16"r.
If using standard 5mm accessory cord to string it, drill 3/16" holes on the side of the grip for the knots. On the other side of the grip where the cord will slide through for adjustment, drill 1/4" or 5/16" holds so that the cord will fit through easier and will make moving grip positions easier.

 |  |

Additional Notes:
- Precise control over the width of the flat edge crimp is obtained by cutting two extra pieces of the 3/4" half-round, each 1/2" wider than the width of your grip to create an adjustable finger stop. They can be adjusted setting to pencil lines at 1/8"intervals. Use a rubber band around the ends to hold in place and slide to the desired crimp depth. When not in use they can either be removed or stored out of the way on the inside of the grip.

- optional girth or prusik loop for doorway use while traveling. See our Pocket Rocks page for more info.
- For a way to easily reset the grips back to a previous position/angle, use marks or dental floss as shown here.
- If you desire to have a bar instead of individual grips, you can create one 18" long grip. This means you'd only have to adjust the cords once instead of for each individual grip and it's also a bit simpler to make. However the disadvantage is that it will weight about 40% more and you will not be able to rotate the grips around the vertical axis for comfort. If you have elbow issues using individual grips will allow you to find a more comfortable angle and put less stress on your elbows.
- To train a specific grip type, drill a hole and mount a T-nut in the center of each grip. This gives the option of mounting a small-medium size wall hold. It's easiest to add the T-nut before the PVC and wood are screwed together, though it can still be added after they are finished.
- It's possible to make Simple Grips with the RipCord easy adjustment system of the Gstring PROs. However this will increase their cost; they will hang 3 inches lower; weigh 8 oz. more; and it will increase the complexity of making them. If interested, see this blog post for the basics of how to do this.

Using

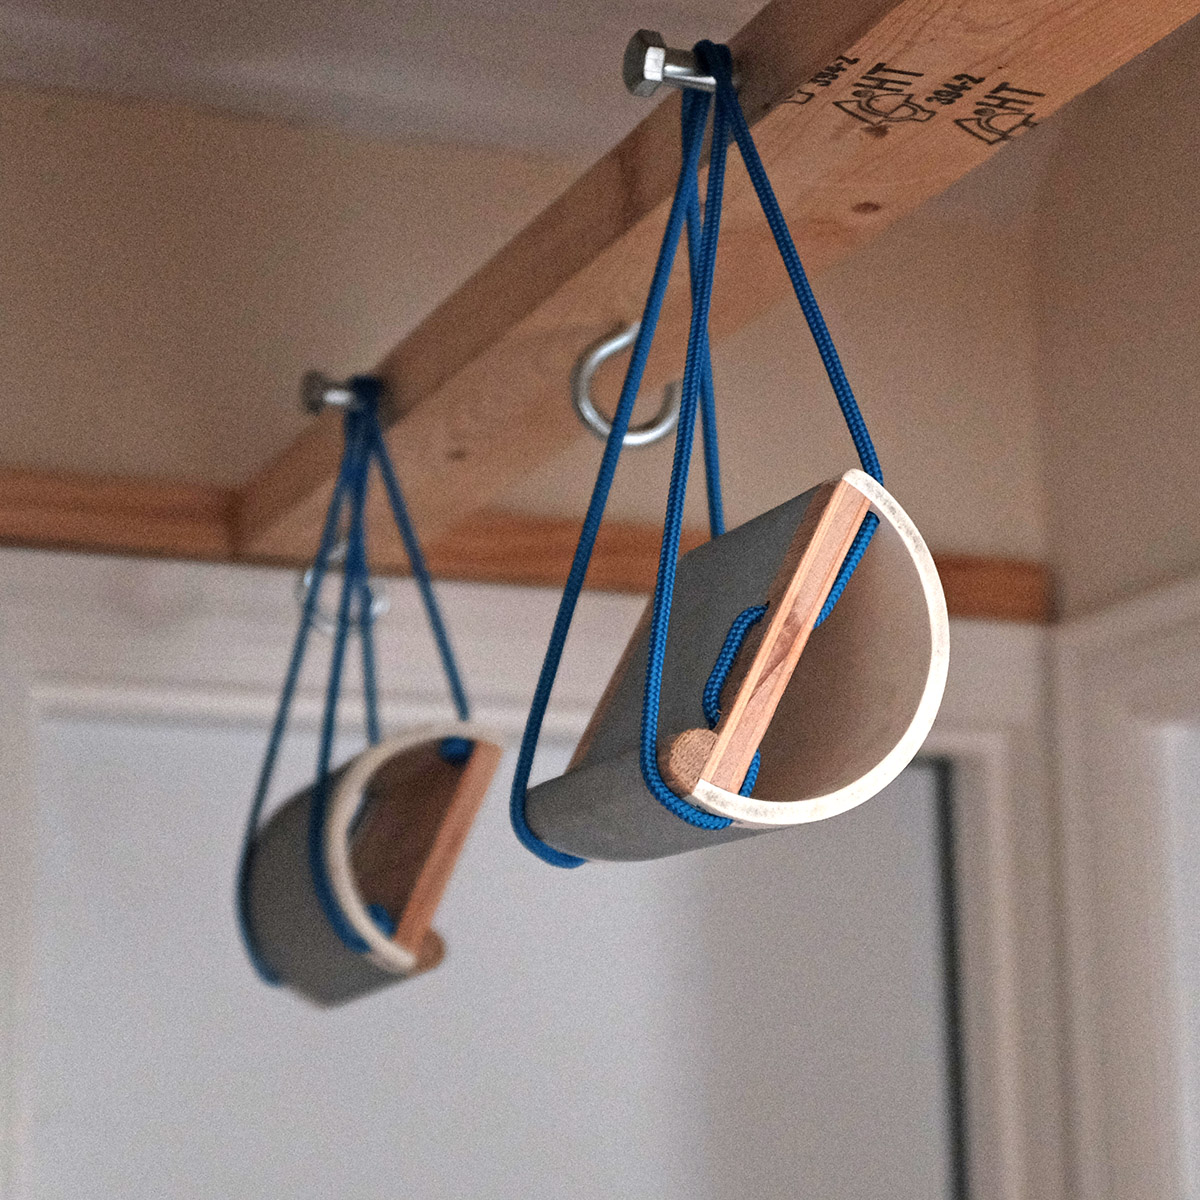
- mount or hang the same has for our Pocket Rocks or Gstrings
- Different sets of grip positions are accessed by either sliding cord to change the relative size of each loop, or by flipping cords to the other side of the grips (see the first photo at top of blog).
- Reverse your hand hand positions (palms facing you) to train for underclings
These grips offer most everything a normal hangboard, hangbar, or commercial training grips offer. About the only thing they don't cover are cracks which no commercial hangboard yet covers. We still hope to produce our prototype Crack Rack as a commercial product and our next two DYI projects (the SqueezeBox and GrooveTube) will offer crack training. Stay tuned.
Great idea, nice and simple but highly effective. Have you thought about marketing the idea at all?
ReplyDeleteWe might consider it in the future. We'd have to figure out if the economics of it works for us. Materials would not be a big cost but they're labor intensive to make - thus, why we made available the plans. Having said that it might be possible to offer them and cover our costs plus a reasonable profit.
ReplyDeleteWhat is the thickness of the pvc pipe if I may ask? I reckon it has to be very sturdy to withstand the force it undergoes. And what's the original purpose of the piping? So I can go straight to the corresponding aisle in the store. Definitely want to make these beauties.
ReplyDeleteIt is 4" sched. 40 PVC. It is called 4" which is the inside diameter. The outside diameter is 4.5" and the wall thickness is approx. .25" With the plywood/hardwood, screws and glues it is way strong - stronger that it needs to be for the intended use.
ReplyDeleteGreat work ! And many thanks for sharing the plans.
ReplyDeleteLike Max, I am wondering how to find these pvc pipe...I only find less thick pipe, for plumbing...around 0.11inch at most (and it's probably not enough).
Do you have any clue how to find these ?
Are you in the states or elsewhere. If outside the states I'm not sure where you can get it. In the states, you should be able to get the PVC at any Lowes, Home Depot or True Value hardware store. You might have to buy a longer piece (ie 10') and they might have to order it. Both the stores around here had pieces as short as 2'. I've meant to try the thinner stuff to see how it works. My feeling is that it probably would. I think that is call Sched 20 PVC. The stuff I've used is all Sched. 40. I'm currently working on finishing up a bar (instead of two individual grips) and am using what is called Electrical conduit PVC. It is smaller dia. (3.5" dia.) but is still Sched 40 specs. I did have to buy 10' of it though.
ReplyDeleteThank you for your anwser !
ReplyDeleteUsing "Schedule 40" in google, I found that these pipes are not that easy to find in Europe.
I'll continue searching, and I keep you informed if I find something.
I misspoke. I said the pipe you mentioned was sched. 20. It is sched. 10. Here is a handy chart that lists the specs. for different schedules of PVC pipe: http://www.pipeflowcalculations.com/tables/schedule-10.php Click on the sched. desired and the chart changes to reflect the specs. I think sched. 10 would work and would end up being lighter weight for travel. The PVC pipe is strengthened by the wood and the main grip position that uses the PVC pipe, it the slope and large jug. In these grip positions the climber's weight is distributed on the whole semi-circle surface of the pipe which is strengthen by the wood. If you or someone tries the schedule 10 pipe (.12" / 3mm), please report back the results.
ReplyDeleteThese are all very innovative. After reading through this material and watching the demo videos, I want to make a G-Bar...and make these grips...AND buy the SIC G-string grips. Fantastic work, guys!
ReplyDeleteCan Confirm are awesome. Next versions I will be more precise with the drilling and screwing
ReplyDeletehttps://photos.app.goo.gl/sn8EPqh5zkL4aJWY8